How to Prepare Artwork for Print
Graphic design has evolved so much in the 18 years we have been in business. Print companies now receive artwork from an ever-expanding number of sources, from professional graphic designers to individuals who have learnt how to use graphic design software on their home PCs. Whether you are professionally trained or simply decided to turn your creative skills to graphic design, this article is designed to provide Top Tips on how we can help you bring your creative work to life.
We can work with artwork from any software package or platform, for example: Photoshop, Adobe, Illustrator, InDesign or Canva. New software packages emerge all the time, so if you are using a different software to those listed above, please contact us to see if it’s compatible for our printing processes.
Preparing artwork for print is a crucial step in the printing process. It ensures your design will come out looking exactly as you intended, with vibrant colours and crisp lines. Whether you’re creating a brochure, a business card, or a large-format poster, the following steps will help you prepare your artwork for print.
![]()
Use the Right Colour Mode
One of the most important things to consider when preparing artwork for print is the colour mode.
There are two main colour modes used in digital printing: RGB and CMYK. RGB (Red, Green, Blue) is the colour mode used for digital screens, while CMYK (Cyan, Magenta, Yellow, Black) is the colour mode used for printing.
When creating artwork for print, it’s important to work in CMYK mode to ensure that the colours you see on your screen match the colours that will be printed. If you create artwork in RGB mode, the colours may look different when printed.

Check you are using the correct colour mode
![]()
Check Image Resolution
Another important factor to consider when preparing artwork for print is image resolution, as this affects the level of detail and sharpness for the printed item.
Images that are low resolution (72 dpi) may look fine on a PC/Mac screen but will appear blurry or pixelated when printed. To ensure your images look crisp and clear in print, they should have a resolution of at least 300 dpi at the dimensions you intend to use the image, as higher dpi (dots per inch) ratios ensure printed images will be far more detailed and not blurred.
That’s why 300 dpi is considered THE standard for high quality printing, because it is the resolution that produces sharp, crisp, and detailed images which appear smooth to the human eye.

Use a resolution setting of 300 dpi to ensure images are sharp and detailed
![]()
Page Set Up
When preparing artwork for print, it’s important to include bleed and crop marks.
When setting up your artwork, it’s essential to include a bleed area around the edges of the design. Bleed is the area outside the edge of the printed document that extends beyond the edge of the final trim size.
Bleed is important because it ensures there are no white borders around the edge of the printed piece.
Crop marks are also essential as they provide the lines that indicate where the final trim will be made.
The bleed area should be at least 3mm on all sides of the document, and the crop marks should be placed outside the bleed area. This will ensure that the final printed piece is trimmed exactly where it needs to be, so there are no white borders around the edge.

Bleed and crop marks ensure a clean-cut finish
![]()
Use Vector Graphics
Vector graphics are images that are created using mathematical equations instead of pixels. This means they can be scaled up or down without losing quality.
When preparing artwork for print, it’s best to use vector graphics whenever possible.
Vector graphics are ideal for logos, text, and other simple graphics. If you need to use raster graphics (images created with pixels), make sure they have a high-resolution and are saved in a format that supports transparency, such as PNG or TIFF.

Vector graphics are the ideal way to create logos
![]()
Review and Proofread
It may sound obvious, but one of the most common errors we find when we prepare work for print is that it has not been proof-read thoroughly and contains errors, omissions, incorrect colours, or alignment issues.
Before sending your artwork to a printer, it’s essential to review and proofread it for any errors or mistakes. Check for typos, ensure the colours are accurate, and confirm that the artwork is aligned correctly. These steps can save time, money, and frustration by preventing the need for reprints.
We know mistakes can happen, but it really is worth taking a moment to check carefully before submitting the final artwork to your printer.

Review and proofread before submitting artwork
![]()
Choose the Correct File Format
Before sending your work to the printer, it’s essential to choose the correct file format to send to your selected print provider.
The most commonly used file format for print is PDF (Portable Document Format). PDFs ensure your artwork is preserved in a format that is easily readable by printers and is unlikely to change during the printing process. Additionally, PDFs can be easily opened and printed on both Mac and PC platforms.
So, when you have finished using your graphic design software to create the final version of your piece of work, the file should always be converted to a Print Ready PDF before sending it to your print provider.

Choose the right file format before submitting your artwork
GETTING IT RIGHT FROM THE START
Outputting your work for print requires attention to detail and adherence to specific guidelines.
By following the steps above, you can ensure your artwork is print-ready and achieves the best possible results. And don’t forget to work closely with your selected printer. Part of our role is to ensure your artwork meets your customer’s specific requirements and guidelines (and the exacting requirements you’ve set yourself).
Need a quick way to upload your artwork files?
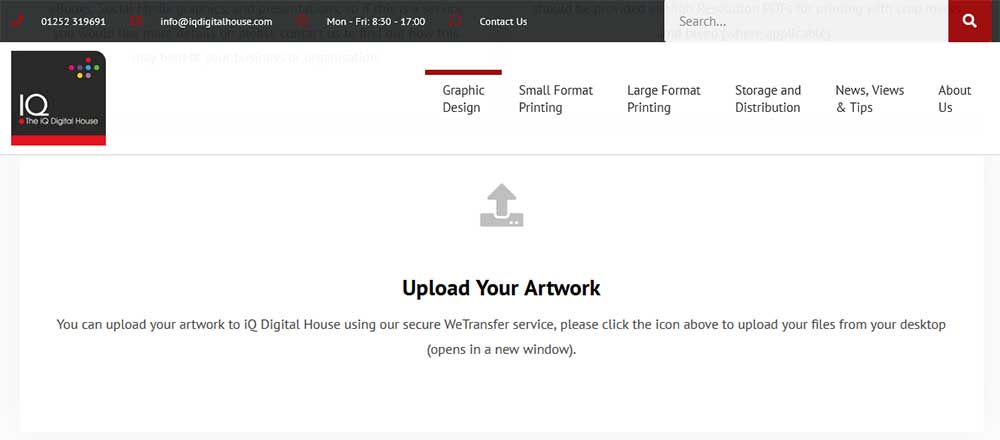
You can upload your artwork to iQ Digital House using our secure WeTransfer service. Simply visit the Graphic Design page on our website, scroll to the bottom of the page, and click on the icon (as shown below) to upload the files from your desktop – this opens in a new window.

There’s a handy shortcut on our website to upload your artwork
How We Help
Our team really enjoy working in a consultative way, discussing options, and offering advice to ensure the graphic designers and customers we work with get the most appropriate products and value for money we can provide.
We’ve been in business for over 18 years and have established a reputation for great service, dependability, and competitive pricing. That’s why we are the “preferred provider” for an increasing number of graphic designers, graphic design companies, graphic design students, and individuals who have an interest in graphic design.
So, if you are looking for a printing company to produce fantastic results from your creative work, please contact our Commercial Director, Lisa Mortimore on 01252 796 903 or email [email protected].
You are also very welcome to come and meet the team at our Aldershot base and take a tour around our facility.
Published August 2023
Categories: Graphic Design, Small Format Digital Print, Large Format Digital Print


